How to correctly prepare the project of casting?
Our team of graphic designers is able to create for you an exceptional project of casting: medal, coin, key ring, pin and even a statue. However, we keep getting questions on how to correctly prepare the project for production by oneself.
If you want to develop a project on your own, here are some tips that will help you. We invite you to read the following guidelines so that you can make your own professional and advanced project of 2D casting.
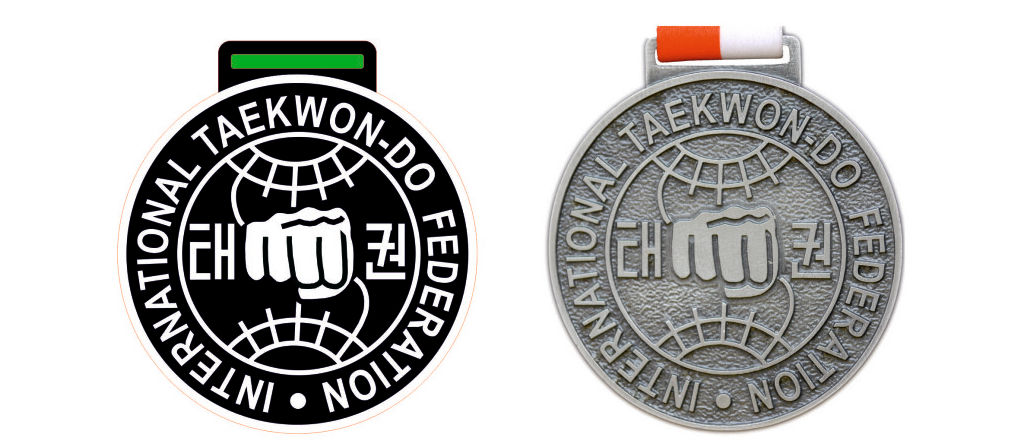
• Mark convex elements by white colour – they will be perfectly smooth, we usually make convex graphics and logos
• Mark concave elements by black colour – on the casting they will be deeper and darker than the convex elements.
• Additional elements (if needed) should be marked by blue colour.
• Transparent elements such as carved space for the sash should be marked by green colour.
• The file should be made in vector curves in a 1:1 scale.
• The minimum thickness of a single line should not be less than 0.3 mm
• The project cannot have raster graphics.
• Casting border should be marked by a 0.001 mm thick red line.
• Project cannot have tonal transitions.
• Please save the file in the format: Corel Draw (.cdr) up to version X7, .pdf, .eps.
Below you will find a properly prepared sports medal project and finished casting with carved space for a ribbon allowing hanging around the neck.
